USD Assembly Pipeline
I designed and automated an assembly workflow that uses Universal Scene Description (USD) to manage set dressing organization and keep consistency between assemblies across shots. Read more below for details!

Asset Steps
- The modeling team publishes their work which exports the proxy (and render, if it exists) versions of the model to USD and stores them on the network.
- The surfacing team publishes their work which exports the textured render of the model and stores it on the network.
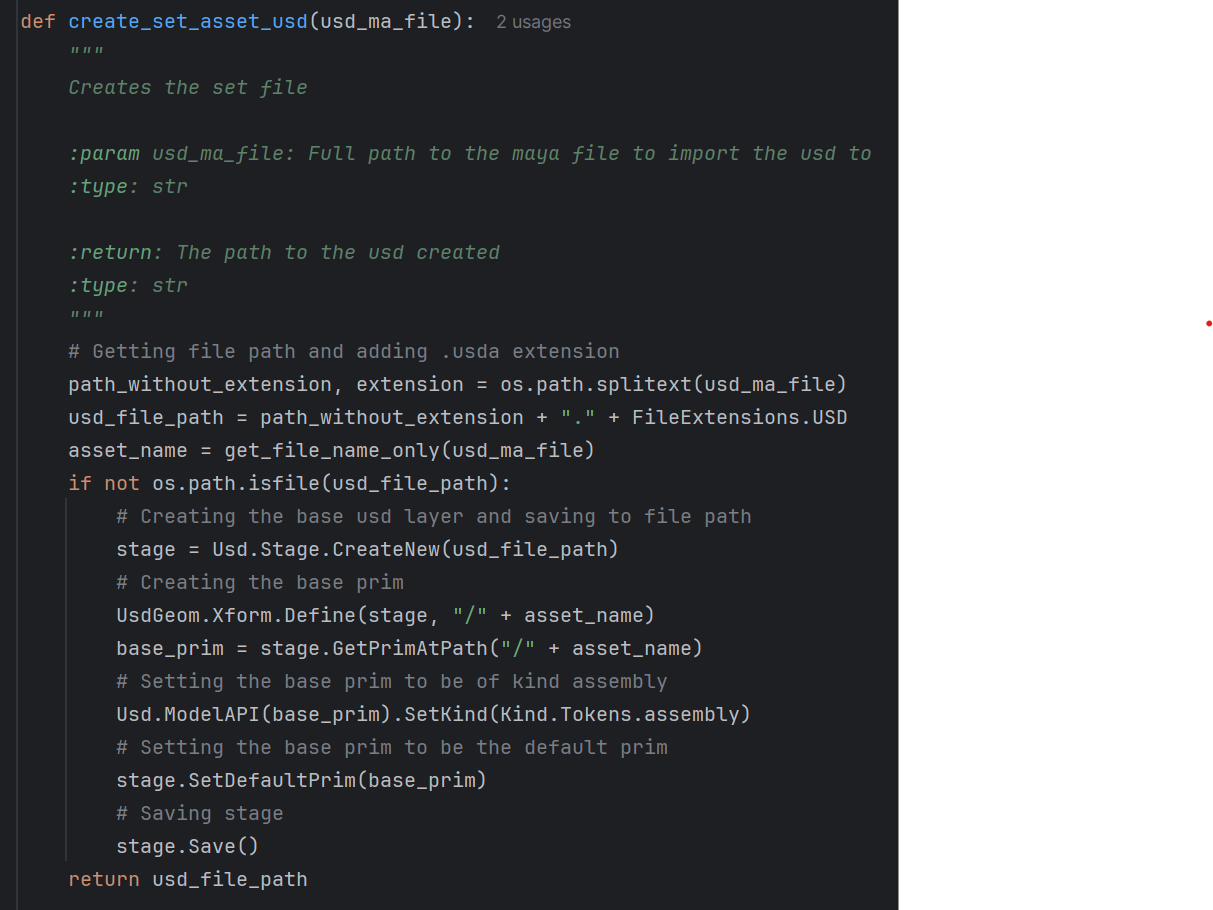
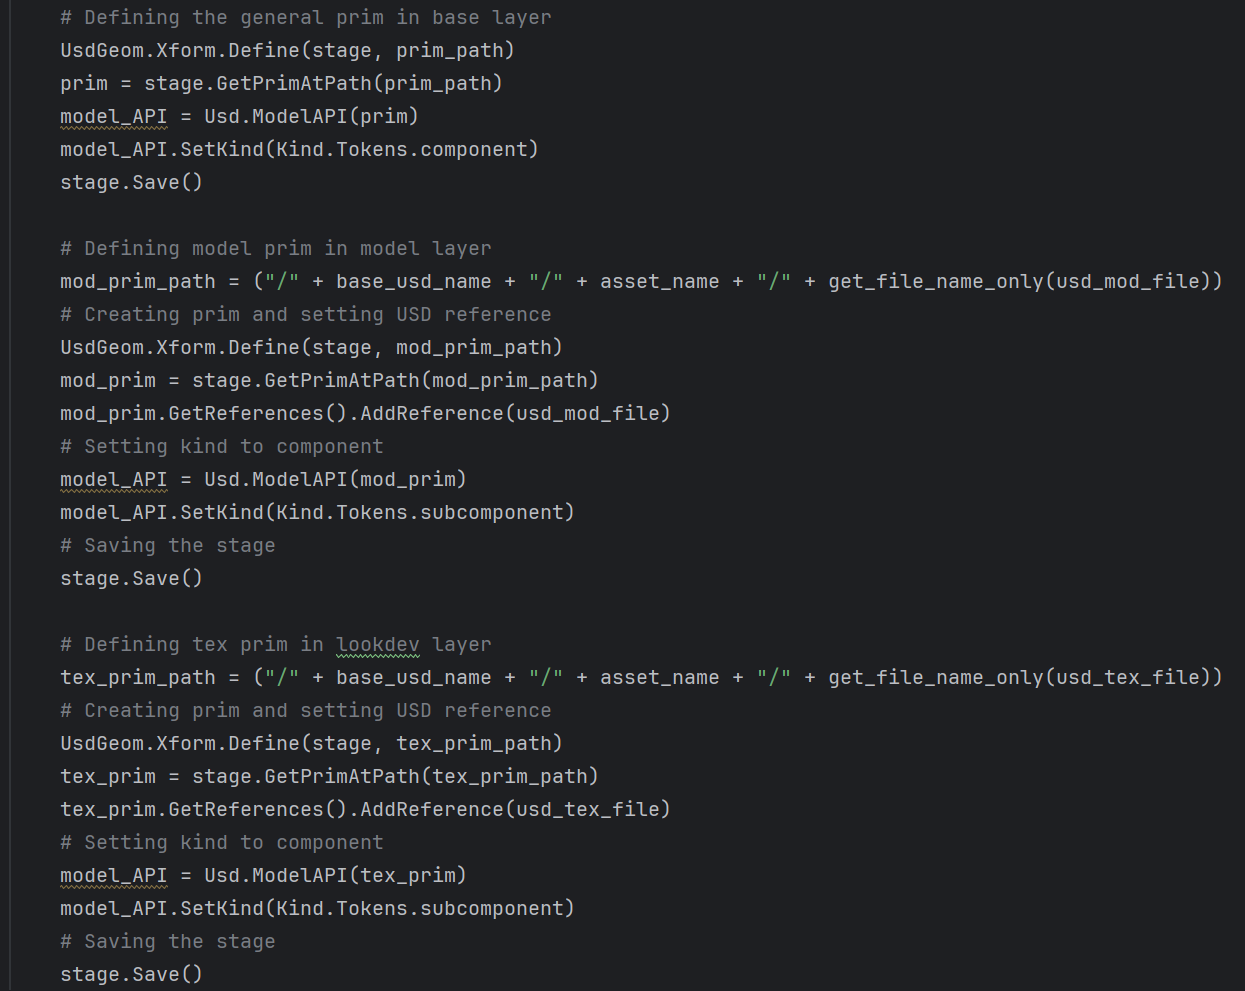
- When a set dressing artist first opens an assembly asset, a base USD file named after the asset is created and imported into their Maya scene. When the base USD is created:
- The USD kind is set to assembly. This is done so that an assembly can be imported into another assembly in the future if needed.
- The base prim is set to be the default prim for the USD. All assets in the future are automatically imported into the contents prim.
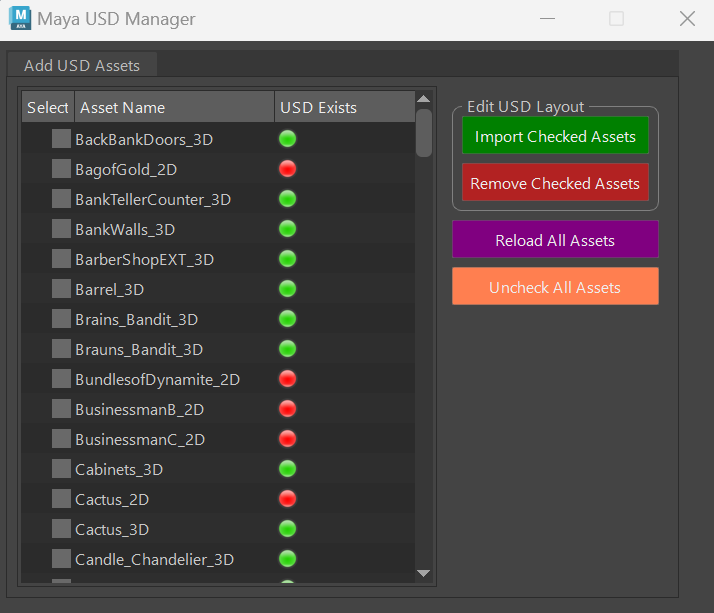
- The set dressers use the USD Manager tool to add and remove assets to the USD, then they can move them around as needed.
- The tool queries ShotGrid to gather project data and assemble a list of all a ssets in the project, with icons that indicate whether an assembly is able to pull in that asset.
- Green icons indicate that the asset's USD file exists on the network so the artist can therefore import the asset into their assembly.
- Red icons indicate that the asset cannot be imported.
- Yellow icons indicate an assembly asset.
- The artist can check the assets they want to import into the assembly (Import Checked Assets).
- When they import an asset, it creates a prim with a USD reference. Then, the proxy model and the textured render model are added as sublayers of this prim with their corresponding purposes set.
- The artist can check the assets they want to remove from the assembly (Remove Checked Assets).
- The artist can choose to reload the USD if they would like to reload any changes made to any USD references while they were working with it (Reload All Assets).
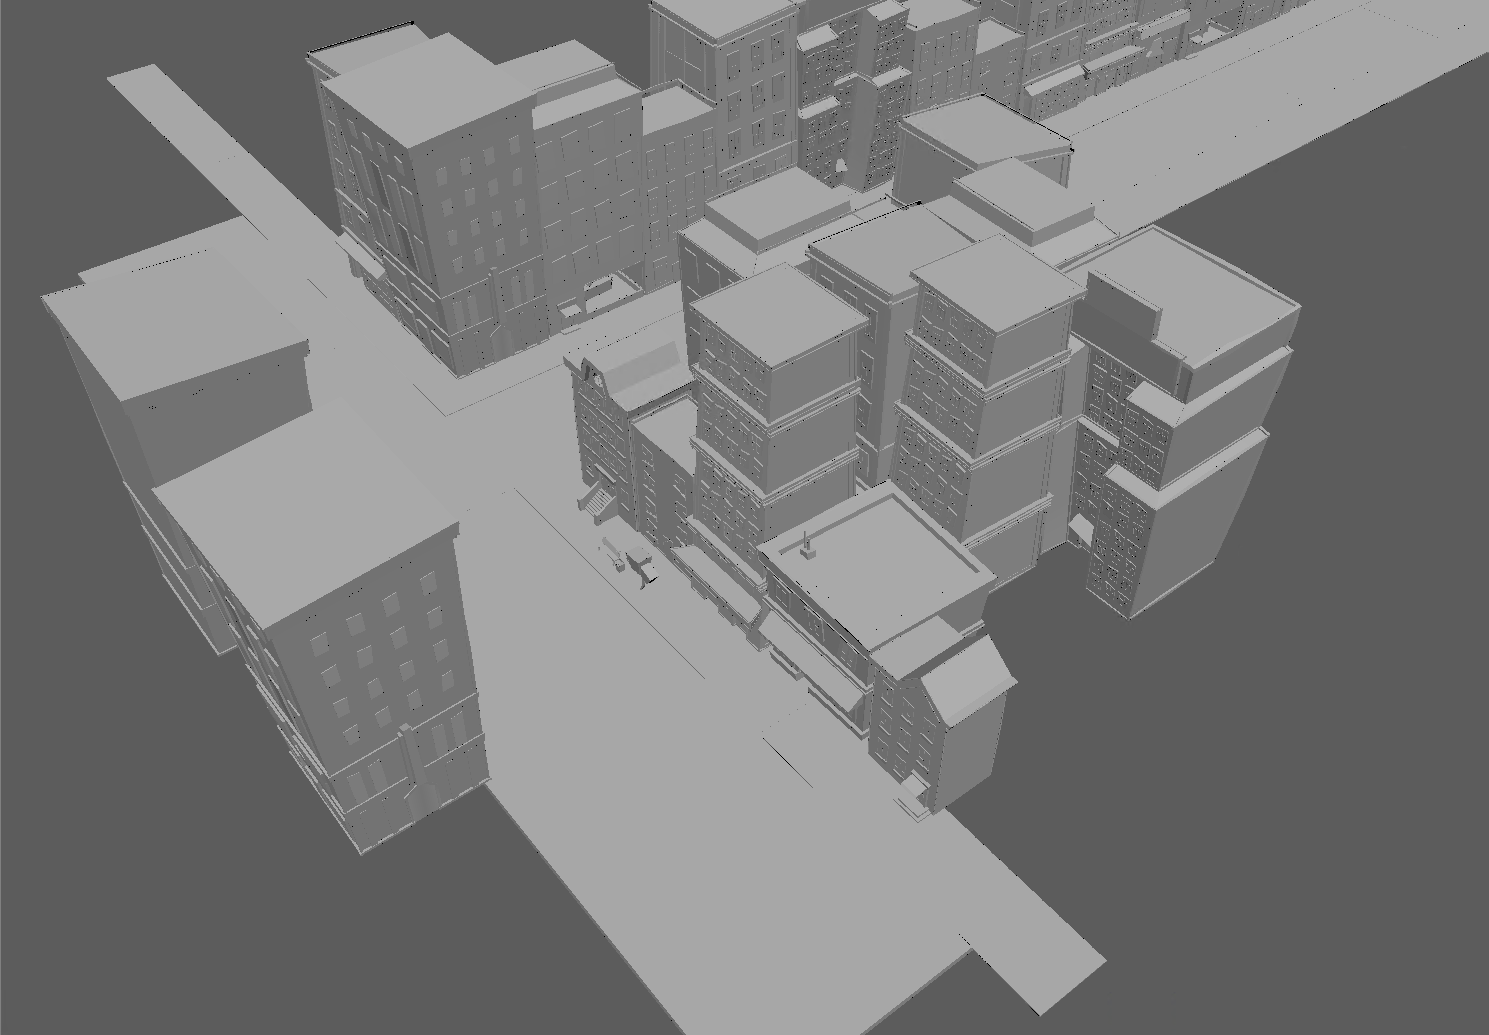
- From here, the assembly can be pulled into layout, animation, and lighting shots. Each discipline has either proxy or render purpose set on the assembly as per what they use (layout has proxies, animation and lighting have renders).
Shot Steps
- Layout imports the assembly they are assigned into their shot (in the future I would like to be able to have the pipeline query ShotGrid instead for assigned assembly to a shot rather than have layout artists choose it). These sets are added to the set sublayer of the general shot layer. Then, a layout layer is created and targeted for any extra changes layout may need to make to the assembly.
- Animation imports the general shot layer into their scene. An Animation sublayer is then created about the Layout sublayer and targeted for any changes animation needs to make to the assembly.
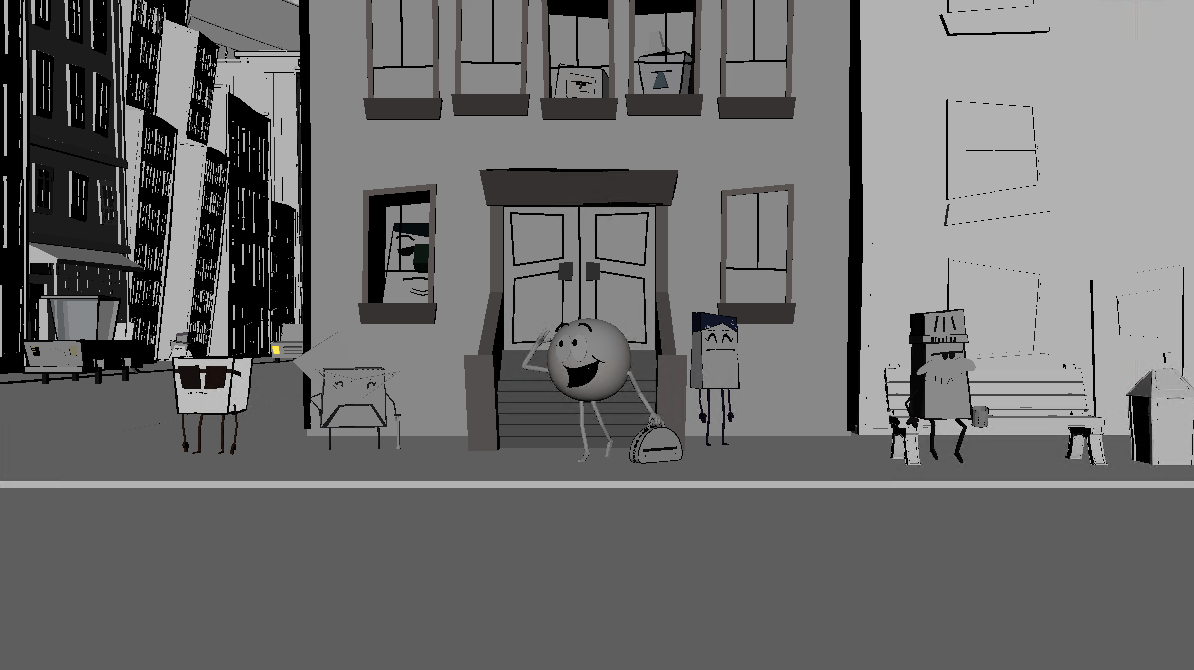
- Lighting imports the general shot layer into their scene. Similarly, a Lighting sublayer is created and targeted. The assembly's stage display purpose is set to render to show only textured assets.
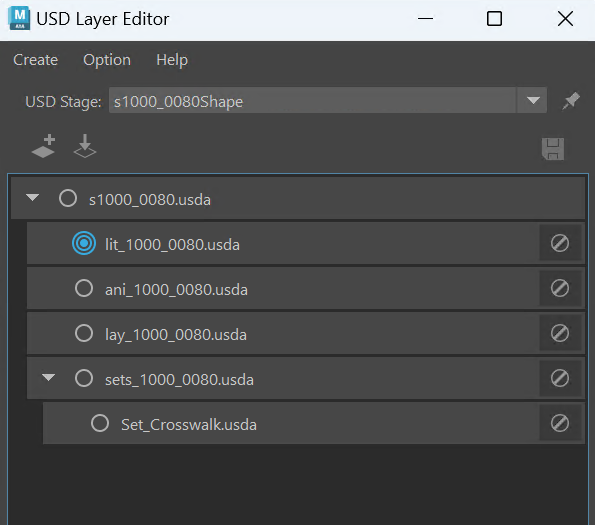
Above is a picture of the USD layer editor once it reaches the lighting discipline.